Getting started
Install Homestead, open the window, and put the first layer on the map. There is nothing else to do: GDAL, PROJ and GEOS travel inside the package, there is no account, and the only things that leave your machine are the basemap tiles you look at and any dataset you fetch by address yourself.
Install
Download the file for your computer from the product page. Each one has its SHA-256 checksum in the SHA256SUMS beside it.
| Platform | What you get and what to do |
|---|---|
| Linux | An AppImage for x86_64. Make it executable (right-click › Properties › Allow executing, or chmod +x) and run it; nothing is installed. It runs on Ubuntu 22.04 and later, Debian 12 and later, Fedora 36 and later, and any distribution with WebKitGTK 4.1. It does not run on AlmaLinux, Rocky or RHEL 8 and 9, which ship WebKitGTK 4.0 only. |
| Windows | An installer for x64, Windows 10 and 11. It is not code-signed yet, so Windows asks twice: SmartScreen shows Windows protected your PC; click More info, then Run anyway. The installer registers .hstd project files with Homestead. |
| macOS | A disk image for Apple Silicon only (an M1 or newer), macOS 11 Big Sur or later. Open the image and drag Homestead to Applications. The app is signed and notarised by Apple, so there is no security warning. Intel Macs are not supported. |
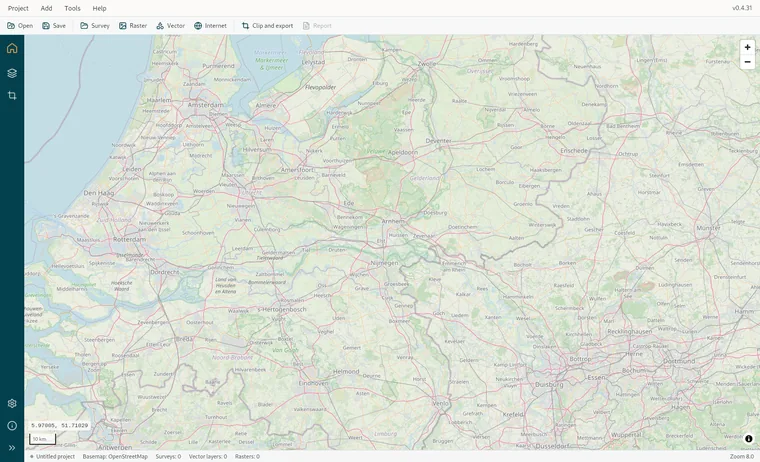
The first look
The window opens on the map. Along the top is Homestead's own menu bar, with Project, Add, Tools and Help, and a toolbar of the same actions under it. The version reads at the bar's right end. The dark rail down the left holds the two panels, Layers and Clip and export, and the two pages, Settings and About. Its last button widens the rail to show the labels. The map starts over whichever country is set in Settings, Indonesia at zoom 4 until you change it, with OpenStreetMap underneath. The window walks through every part.
The first layer
Choose Add › Vector file…, or Vector on the toolbar, and pick a Shapefile, a GeoJSON, a GeoPackage, a KML, a GPX, a CSV with coordinates, or anything else on the format list. Several files at once is fine. The map zooms to what you opened, and the Layers panel opens beside it if nothing was showing. A large file is read once, indexed once (Preparing the spatial index, once per file…), then cut into tiles as you pan. After that first pass it stays quick, in this session and in every one after.
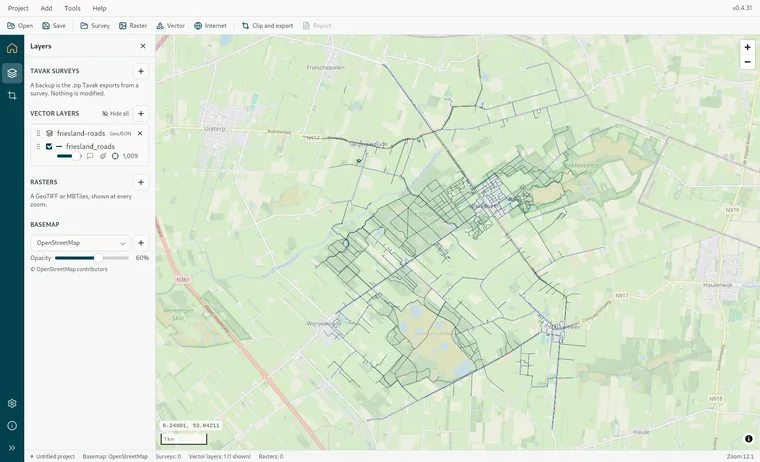
A raster goes the same way, through Add › Raster…, with a GeoTIFF, an MBTiles or a JPEG 2000. One without overviews gets a pyramid built for it once, in the background, with the progress showing in its row. Until that finishes, only the finest zooms draw. Rasters has the details.
A Tavak survey is Add › Survey… with the backup ZIP the phone exported: see Opening a survey.
Where next
- Vector layers: every way a file gets onto the map, and what happens to it on the way.
- Styling: colours, symbols, and colouring by a field.
- Clip and export: an MBTiles basemap for the phone, a Cloud Optimized GeoTIFF, or a GeoPackage of the visible layers.
- Projects: keeping the desk as a file.