Basemaps & Offline Maps
Tavak draws your survey on top of a basemap. There are three kinds, and all of them are yours to set up:
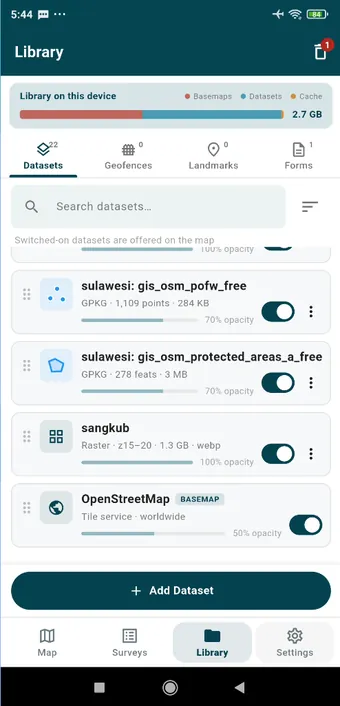
- OpenFreeMap Bright, which is the default, or OpenFreeMap Liberty. These are the two built-in basemaps: OpenStreetMap data drawn on the phone, with nothing to set up. Both sit in Map layers › Datasets, Bright switched on at the bottom and Liberty just above it with its eye shut. To swap them, open Liberty’s eye and shut Bright’s, or drag one below the other; whichever dataset is lowest and switched on is the basemap. Anywhere you view online is kept on the phone and drawn again offline. For a whole area offline, import an MBTiles basemap.
- Online basemaps you add yourself, from any XYZ or TMS tile service: satellite imagery, your organisation’s own tile server, an ArcGIS REST service, a WMTS endpoint. All covered below.
- Offline basemaps: MBTiles files and georeferenced images, meaning GeoTIFF, GeoPDF, and JPEG or PNG with a world file, imported from the device.
Adding an online basemap
In the app:
- Open the Library tab, then Add Dataset › Online Basemap.
- Tap Add Basemap, then Online Basemap.
- Give it a Name. This is how it appears in the basemap list.
- Paste the Tile URL template (see below).
- Optionally set subdomains, the zoom range, TMS, and an attribution line.
- Tap Test. Tavak fetches a single tile at the service’s minimum zoom, near your position if it knows it, and tells you what came back. A typo or a blocked service turns up here rather than as an empty map later on. If the service only covers one region, test from inside it.
- Tap Add. The basemap now appears in Library › Datasets and in the layers button on the map.
To use it, tap it in the Basemaps list, or open the layers button on the map and pick it under Online Basemaps. To change it or get rid of it later, use the pencil icon on its card, or swipe the card from right to left.
The tile URL template
A tile service names each tile by its zoom level and its position on the grid. The template tells Tavak where those numbers go:
https://example.com/tiles/{z}/{x}/{y}.png| Placeholder | Meaning |
|---|---|
{z} | Zoom level. Required. |
{x} | Tile column. Required. |
{y} | Tile row. Required. |
{s} | Optional. Works through the subdomains you list, say a, b, c, so requests are spread over several hostnames. |
The three required placeholders can come in any order, which is why ArcGIS-style services work as they are; they put the path in the order {z}/{y}/{x}:
https://<your-arcgis-host>/arcgis/rest/services/<ServiceName>/MapServer/tile/{z}/{y}/{x}A WMTS endpoint works the same way once it is written in RESTful tile form. If a provider documents its tiles as {TileMatrix}/{TileRow}/{TileCol}, paste that in as it stands: Tavak rewrites them to {z}, {y} and {x}, and a {-y} row switches the TMS scheme on. Any other placeholder, an {apikey} for instance, is refused, so put the key straight into the URL. Only https:// addresses are accepted.
If the service needs a key, put it in the template exactly as the provider documents it, for example as a query parameter:
https://example.com/tiles/{z}/{x}/{y}.png?key=YOUR_KEYThe key is stored on the device along with the basemap. Treat a URL that contains your key as a credential: it is not encrypted, and it goes to that provider with every single tile request.
Worked example: Esri World Imagery
Esri publishes World Imagery as an ArcGIS REST tile service. As an online basemap, the settings are:
| Field | Value |
|---|---|
| Name | Esri World Imagery |
| Tile URL template | https://services.arcgisonline.com/ArcGIS/rest/services/World_Imagery/MapServer/tile/{z}/{y}/{x} |
| Subdomains | (leave empty) |
| Min zoom | 0 |
| Max zoom | 19. Raise it to somewhere between 20 and 23 if your area has deeper coverage, and lower it if tiles stop appearing |
| TMS tile scheme | Off |
| Attribution | Esri, Maxar, Earthstar Geographics, and the GIS User Community |
Note the {z}/{y}/{x} order, with the row before the column. That is how ArcGIS REST names tiles. The same shape works for other services on that server, swapping World_Imagery for the service name, and for an ArcGIS Server your own organisation runs.
Check what you are entitled to first. Esri’s services come under Esri’s own terms of use, and some uses need an ArcGIS subscription or an API key. Make sure your licence covers what you have in mind, and keep the attribution line where people can see it.
Worked example: OpenStreetMap
OpenStreetMap’s own raster tiles go in the same way, as a basemap you add yourself:
| Field | Value |
|---|---|
| Name | OpenStreetMap |
| Tile URL template | https://tile.openstreetmap.org/{z}/{x}/{y}.png |
| Subdomains | (leave empty) |
| Min zoom | 0 |
| Max zoom | 19 |
| TMS tile scheme | Off |
| Attribution | © OpenStreetMap contributors |
Go easy on it. OpenStreetMap’s tile servers are run by volunteers, and their tile usage policy asks you to keep your use light. If you need heavy use, or a large area offline, go to a commercial tile provider or import an MBTiles basemap instead of downloading from them.
The other fields
| Field | What it does |
|---|---|
| Subdomains | The values that go in place of {s}. Needed if, and only if, your template contains {s}. |
| Min / Max zoom | The range the service really serves. Max zoom is the one that matters: past it the map carries on zooming and scales up the last real tiles rather than going blank. |
| TMS tile scheme | TMS numbers tile rows from the bottom, XYZ from the top. If your imagery comes out upside down, or the map looks mirrored north to south, turn this on. |
| Attribution | The credit line the provider asks for. Type it in here and it travels with the basemap. |
When it doesn’t work
- Test says “Tile not found (HTTP 404)”
- Either the path is wrong or the axis order is. Try swapping
{x}and{y}: ArcGIS services use{z}/{y}/{x}, while most others use{z}/{x}/{y}. - Test says “Access denied” (HTTP 401 or 403)
- Either the service wants a key you have not given it, the key is wrong or has expired, or the provider does not allow this kind of use. Check your subscription and their terms.
- Test succeeds but the map is blank at your survey site
- The service may have no coverage there, or none at that zoom. Zoom out and see, then set Max zoom to the deepest level that has real tiles.
- The imagery is upside down
- Turn on TMS tile scheme.
- Tiles load slowly
- If the provider offers subdomains, use
{s}with them. Failing that, download an offline area before you go out. - “Server replied with text/html, not an image tile”
- The URL is pointing at a web page or an error page rather than the tile endpoint. A sign-in page, most often. Use the tile endpoint the provider documents.
Online basemaps in the field
An online basemap needs a connection. Tiles you have already looked at are cached for you, so somewhere you visited recently still draws when the signal goes, but a cache is no substitute for planning ahead. For a site with no coverage at all, download an offline area beforehand or import an MBTiles or GeoTIFF basemap.
A Cloud Optimized GeoTIFF (COG) served over HTTP cannot be used as a basemap yet. For now, import a GeoTIFF from the device, or publish the raster as an XYZ tile service and add that as an online basemap.
Offline basemaps
There are two kinds, and both come from files on the device, through Library › Datasets › Add Dataset › Raster. Both are copied into the app’s own storage, so you can delete the original afterwards.
MBTiles maps
An MBTiles file holding PNG, JPG or WebP tiles, from QGIS (Processing › Raster tools › Generate XYZ tiles (MBTiles)), MOBAC, TileMill, or any tile downloader. Pick MBTiles (Raster), choose the file, check the name and the metadata, and import. The only size limit is the phone’s storage. A vector MBTiles, with PBF tiles, is recognised and sent to the Layers tab instead.
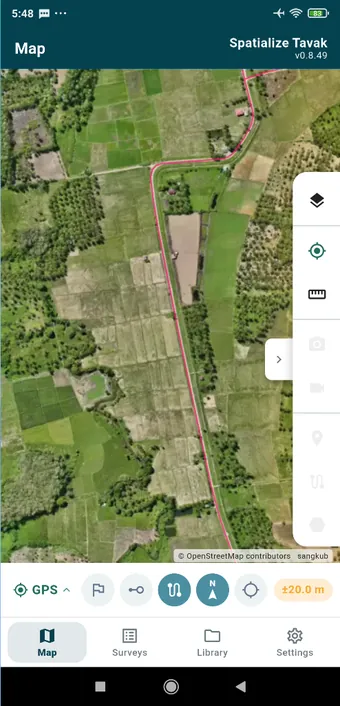
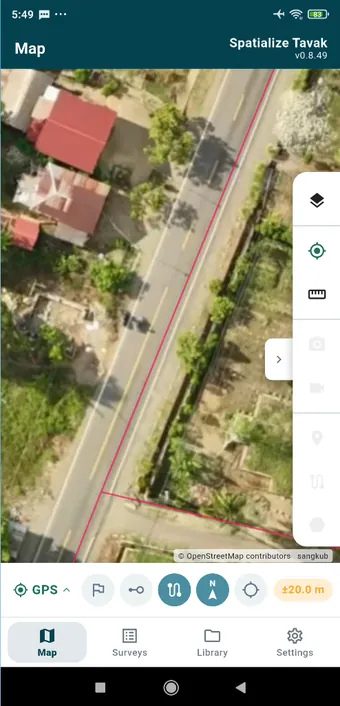
To use it, tap its card and Activate, or pick it under Offline Basemaps in the map’s layers button. Whichever offline map is active is remembered across restarts. Past the map’s deepest zoom the tiles are scaled up rather than going blank, and outside its extent there is simply nothing there.
Georeferenced images
Pick Georeferenced Image for:
- GeoTIFF, with LZW, DEFLATE, PackBits or JPEG compression, 8- to 64-bit and floating-point bands, palette and bilevel images, nodata and alpha. A projected file, whether UTM, TM-3 or any EPSG, is warped through its own coordinate system.
- GeoPDF, where the map is registered from the geospatial data inside the PDF.
- JPEG, PNG, WebP or TIFF with a world file (
.jgw,.pgw,.tfwand so on), up to 50 megapixels. Above that, use a GeoTIFF.
On import the image is converted once into a tiled map, a Web Mercator MBTiles, with a progress bar and a cancel button. After that it draws as tiles, which means no cap on display size, a fixed amount of memory however large the source was, and zooming that stays smooth. Each image has its own opacity, and it can sit over the basemap as an overlay or, with Use as basemap, take its place.
If the world file holds projected coordinates without saying which projection, the Coordinate System screen asks you: search an EPSG code, or pick a UTM zone. Four things are not supported: BigTIFF, planar-configuration TIFF, and CCITT, JPEG 2000 or ZSTD compression. Each is reported rather than quietly drawn in the wrong place.
Vector tiles
An MBTiles file of MVT or PBF vector tiles, from tippecanoe, QGIS or Planetiler, is imported from Library › Datasets › Add Dataset › Vector Data. It is drawn from the tiles as you move: polygons with their holes, lines and points, in the colour, width and fill you set in the layer’s style. Past the tileset’s deepest zoom, the last level is scaled up.
Managing basemaps
In Library › Datasets, tap a card for its options: activate or show, zoom to, and delete, plus opacity and use-as-basemap on a georeferenced image. Swiping a card from right to left deletes it, and deleting takes the copied file with it. Choosing an online basemap while an offline map is active switches the map back to online.